
Items
The Articles section allows you to manage all product sheets in the catalog. From here, you can monitor the status of multilingual descriptions, translate content, and create new articles.
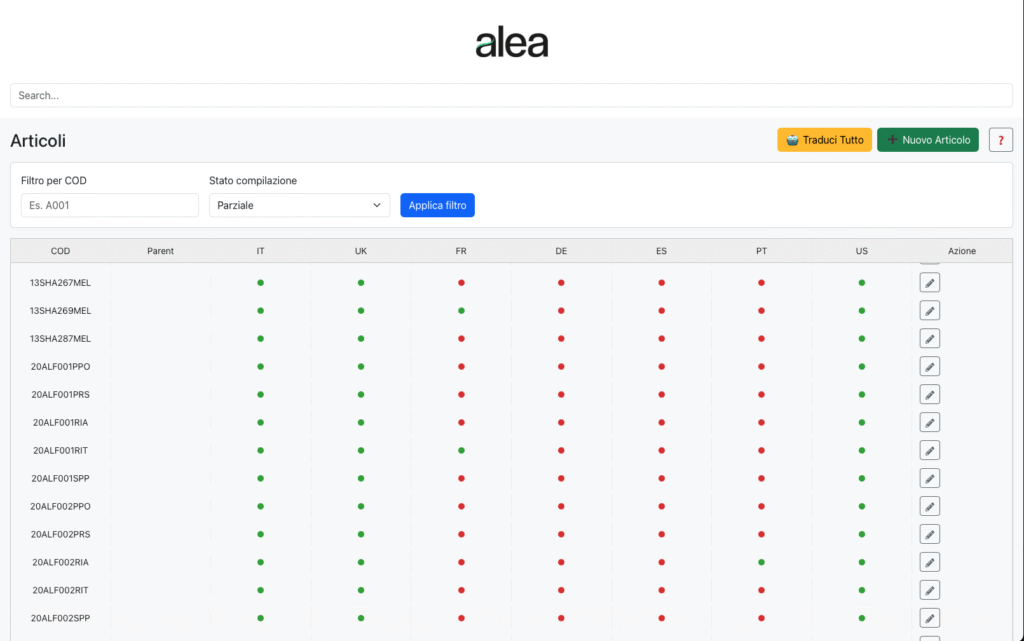
Translate All → Initiates an automatic translation process for all items that require it.
New Article → Allows you to manually create a new article.

Filters
Filter by COD → By entering an item code (e.g., A001), the list is filtered to show only the corresponding item.
Compilation status → Allows filtering based on the completion status of translations (e.g., Partial, Complete, Empty).
Apply filter → Updates the list based on the selected criteria.

Articles Table
The table lists for each article:
COD → Article identification code.
Parent → Parent article code (if there is a hierarchical relationship).
Languages (IT, UK, FR, DE, ES, PT, US, …) → For each active language, the translation status is shown:
🟢 Green = present
🔴 Red = missing
Action → ✏️ Button to open the details and edit the article.
Typical Operational Flow
Use the search field or filters to locate the item.
Check the translation status: the system clearly shows which languages are complete and which are not.
Press ✏️ Edit to open the item card and make changes or enter new descriptions.
If necessary, use Translate All to initiate automatic translation of missing content.
Create a new item with New Item when you need to expand the catalog.
Practical Tips
Use the Compilation Status filter = Partial to quickly find items that need translations.
Before using Translate All, ensure that the base language texts (e.g., Italian) are complete and correct.
The Parent column helps manage families of items: useful for product variants or configurations.
Items – Creating a New Item
The New Item function allows you to add a new product to the catalog. The operation is carried out across multiple tabs (Descriptions, Dimensions, Custom Fields, Inheritance, artneutri plus, Prices, History), but currently, the only active section is Descriptions, which is necessary to create the item and assign it a unique code.
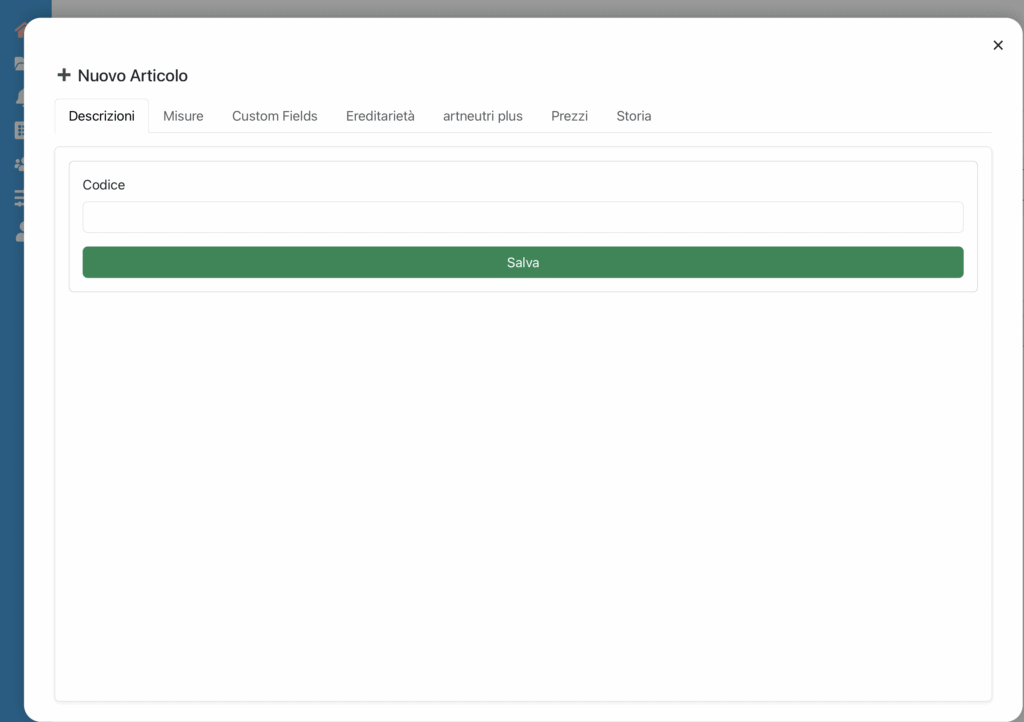
Code
Enter the item’s identification code.
It must be unique: no two items can have the same code.
It is recommended to follow the company’s convention (e.g., prefixes for product family, suffixes for variants).
Save (green)
Creates the new item and records it in the system.
After saving, it will be possible to complete the other tabs (multilingual descriptions, dimensions, prices, etc.).
Operational Flow
Open the Articles section and click on New Article.
Enter the Code in the designated field.
Press Save.
Once saved, the article will be created and the other tabs will become editable to complete the information.
Practical Tips
Ensure the code is not already in use to avoid conflicts or overwriting.
Use short but meaningful codes (e.g., 20ALF001PPO) to facilitate catalog search and maintenance.
After creating the article, immediately complete at least the descriptions in the primary language (e.g., IT) before proceeding with translations or pricing.
Descriptions
The Descriptions tab allows you to enter, modify, and monitor item descriptions in all languages managed by the catalog. Each item can have multiple descriptive fields (DES, DES1, DES2, etc.), which correspond to texts of different lengths or purposes (title, short description, extended description…).

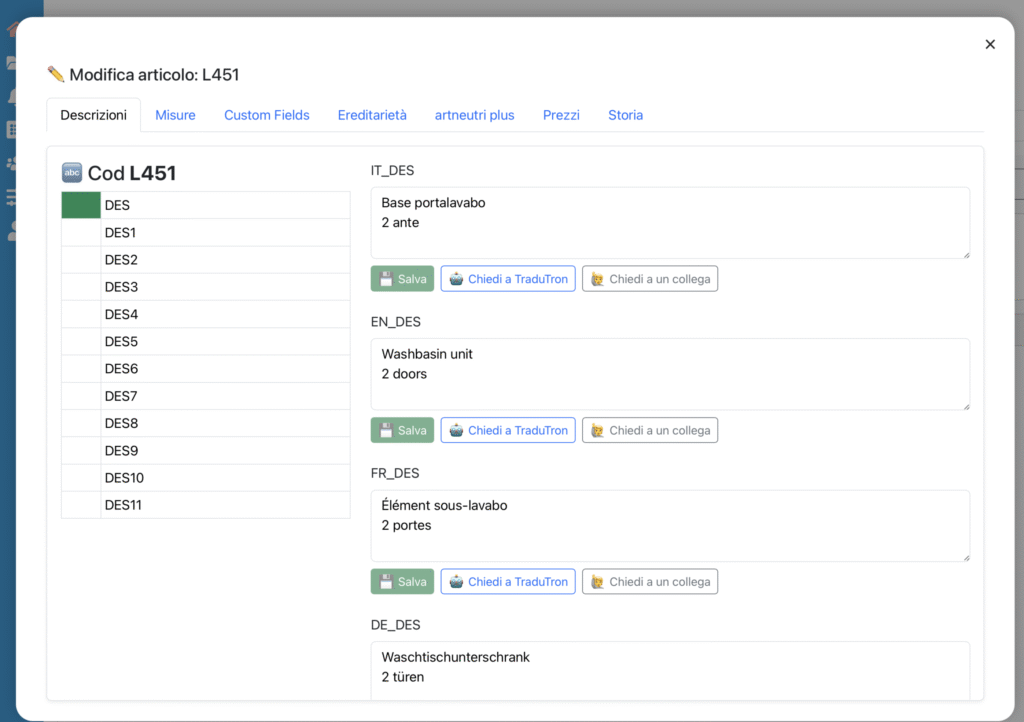
Field list (on the left)
Show all available descriptive fields (DES, DES1, DES2, …).
Each field is colored based on the completion status:
🟢 Green = Complete (all languages have a description)
🟡 Yellow = Partial (some languages have the description, others do not)
⚪️ White = Empty (no description entered)
Editing area (on the right)
For the selected field, display the text boxes for each language (e.g., IT, EN, FR, DE, etc.).
Here you can enter or modify the descriptions.
Available functions
For each language, the following buttons are available:
💾 Save → Records the entered description.
🤖 Ask TraduTron → Automatically requests the translation of the text from the base language (usually IT) via the integrated AI engine.
🙋♂️ Ask a colleague → Allows sending a manual completion request to another user.
Typical operational flow
Select the field to complete from the list on the left (e.g., DES, DES1).
Enter the description in the main language (e.g., Italian).
Use Ask TraduTron to obtain automatic translations, or enter them manually.
Save each description with the 💾 button.
Check the field color:
Green = completed
Yellow = some languages missing
White = no description entered
Always complete the main language (IT) before translating.
Use Ask TraduTron to speed up the process, but check the quality of the translated text.
Use color status to quickly monitor progress: very useful to understand which items are ready and which need completion.
Dimensions
The Dimensions section allows you to enter and modify the dimensional and logistical information of the item. This data is essential for calculations of bulk, shipping, and logistics.
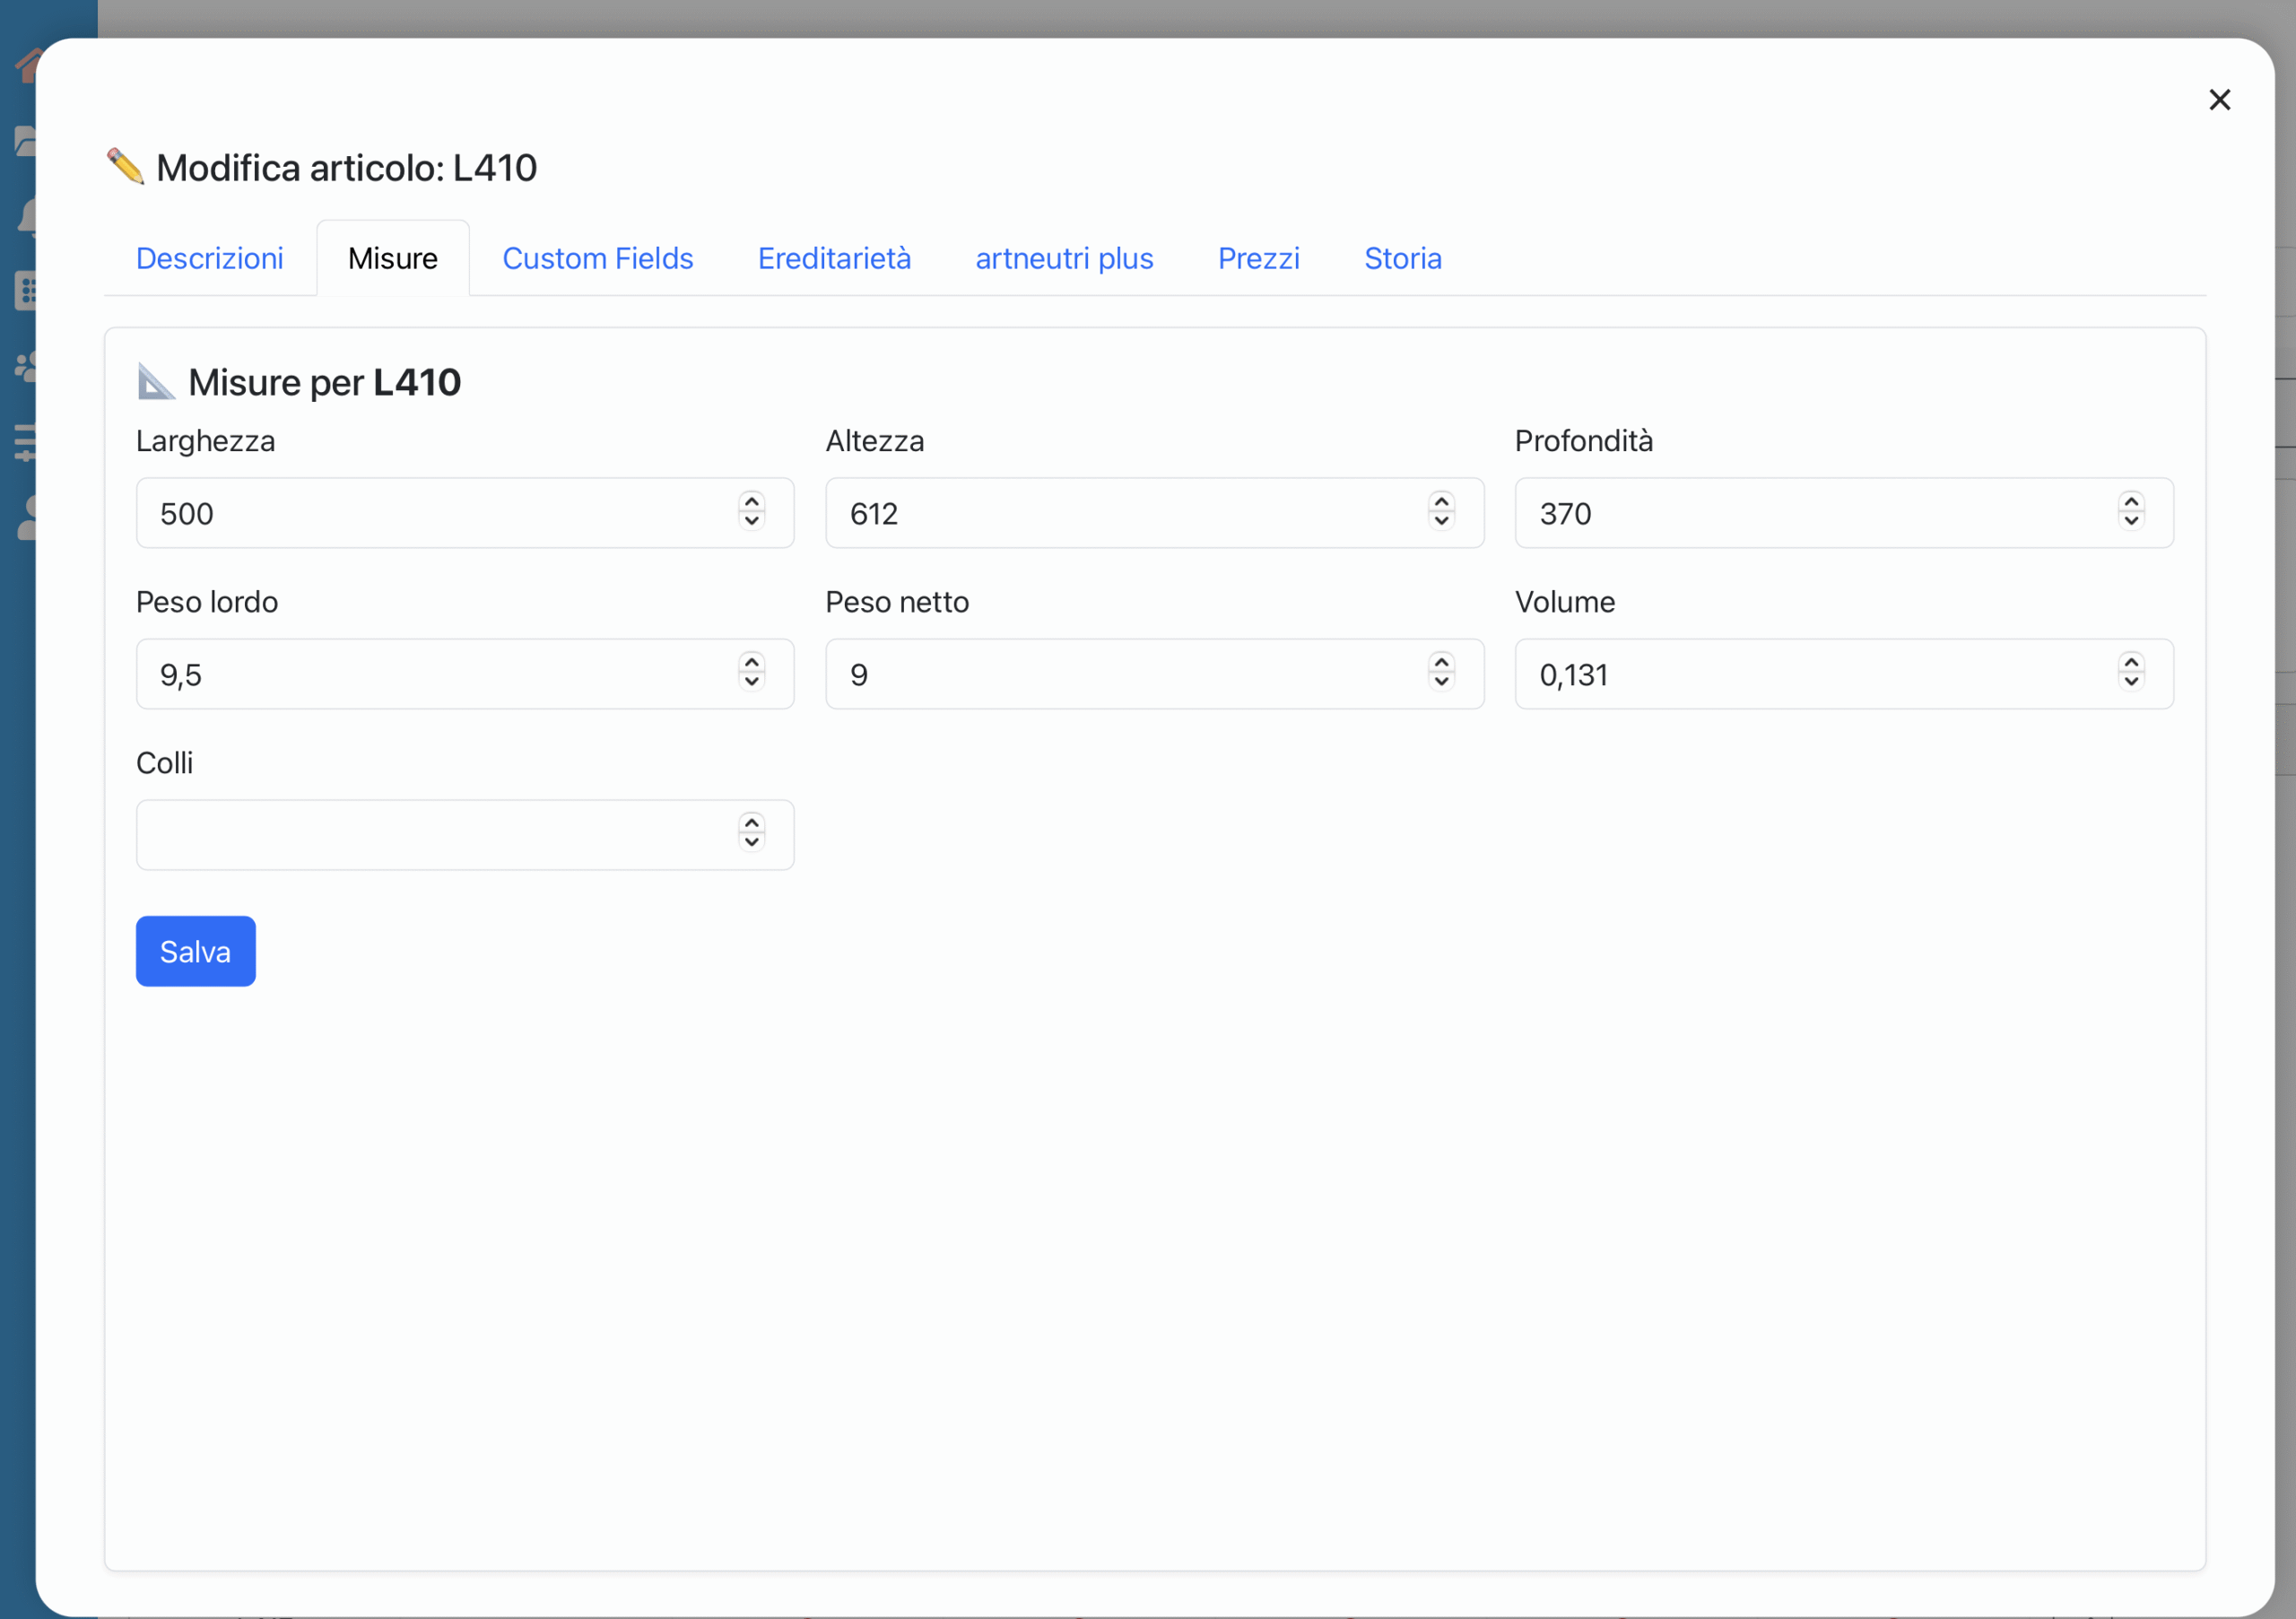
Available Fields
Width (DIML)
Width of the item in millimeters.
Height (DIMA)
Height of the item in millimeters.
Depth (DIMP)
Depth of the item in millimeters.
Gross Weight (PESOL)
Total weight of the item including packaging, expressed in kilograms.
Net Weight (PESON)
Weight of the item without packaging, expressed in kilograms.
Volume (VOLUME)
Volumetric footprint of the item in cubic meters. Can be calculated automatically or entered manually.
Packages (COLLI)
Number of packages (separate parcels) in which the item is shipped.
Functions
Save (blue) → Records all changes made.
Typical Operational Flow
Enter dimensional values (width, height, depth).
Complete with gross weight and net weight.
Enter the volume and number of packages, if known.
Press Save to confirm changes.
Practical Tips
Always use the same unit of measure (mm for dimensions, kg for weights, m³ for volume).
If weight and volume data are not available, leave the fields empty and update them later.
The Packages field is important for logistics: an item shipped in multiple packages will have different handling in warehouse and transport.
Custom Fields
The Custom Fields section allows you to manage the custom fields associated with each item. These fields are useful for handling specific characteristics that do not fall under standard information (descriptions, dimensions, prices).
What are Custom Fields
Custom Fields are additional configurable fields in the catalog Preferences.
They can be defined by the administrator to suit the specific needs of the company.
Each field can represent a technical, commercial, or descriptive attribute (e.g., Opening, Diameter, Extensibility).
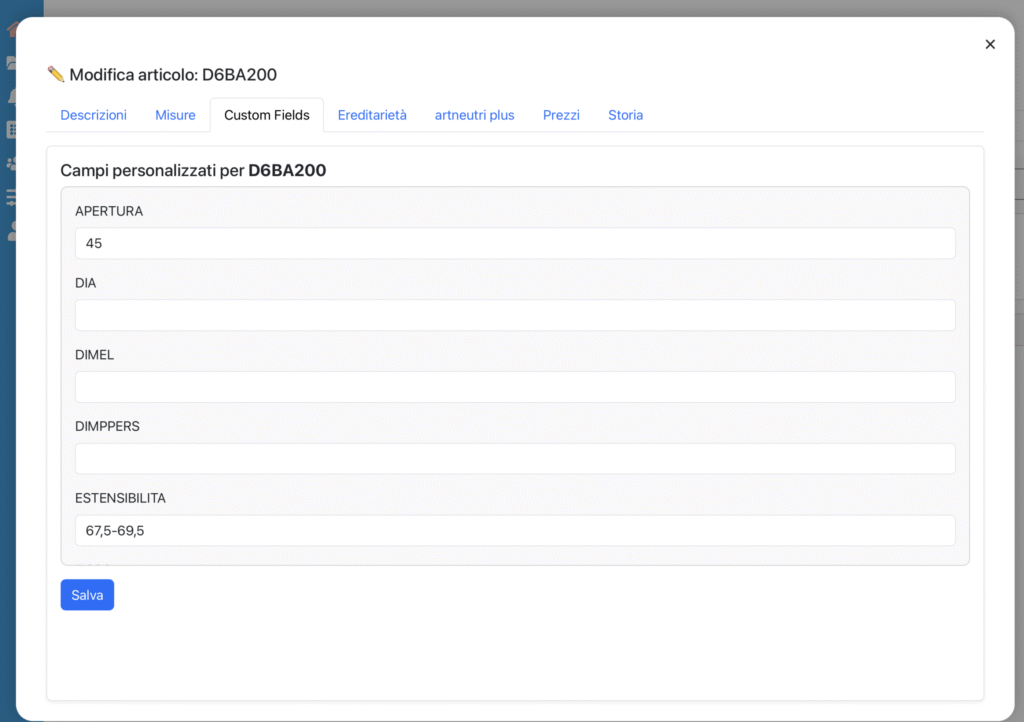
Each row corresponds to an active custom field for the selected item.
Fields are displayed with clear labels (e.g., OPENING, DIA, DIMEL, EXTENSIBILITY).
The user can enter or modify values based on the product’s characteristics.
Functions
Input fields → allow entering numeric or textual values.
Save (blue) → records the entered or updated values.
Typical operational flow
Open the Custom Fields tab for the desired item.
Fill in the available fields based on the specific characteristics of the product.
Example: Opening = 45°, Extensibility = 67.5–69.5 cm.
Press Save to confirm.
Practical tips
Custom Fields may vary from catalog to catalog: if you don’t see a field, it might not have been enabled in the preferences.
Fill in only the fields relevant to the item: unnecessary values can be left blank.
Always use units of measure consistent with company standards.
Inheritance
The Inheritance feature allows an item to inherit descriptions (and in the future, other data) from another “parent” item. This logic is useful for managing product variants that share the same descriptions or characteristics, avoiding duplication and maintaining consistency.
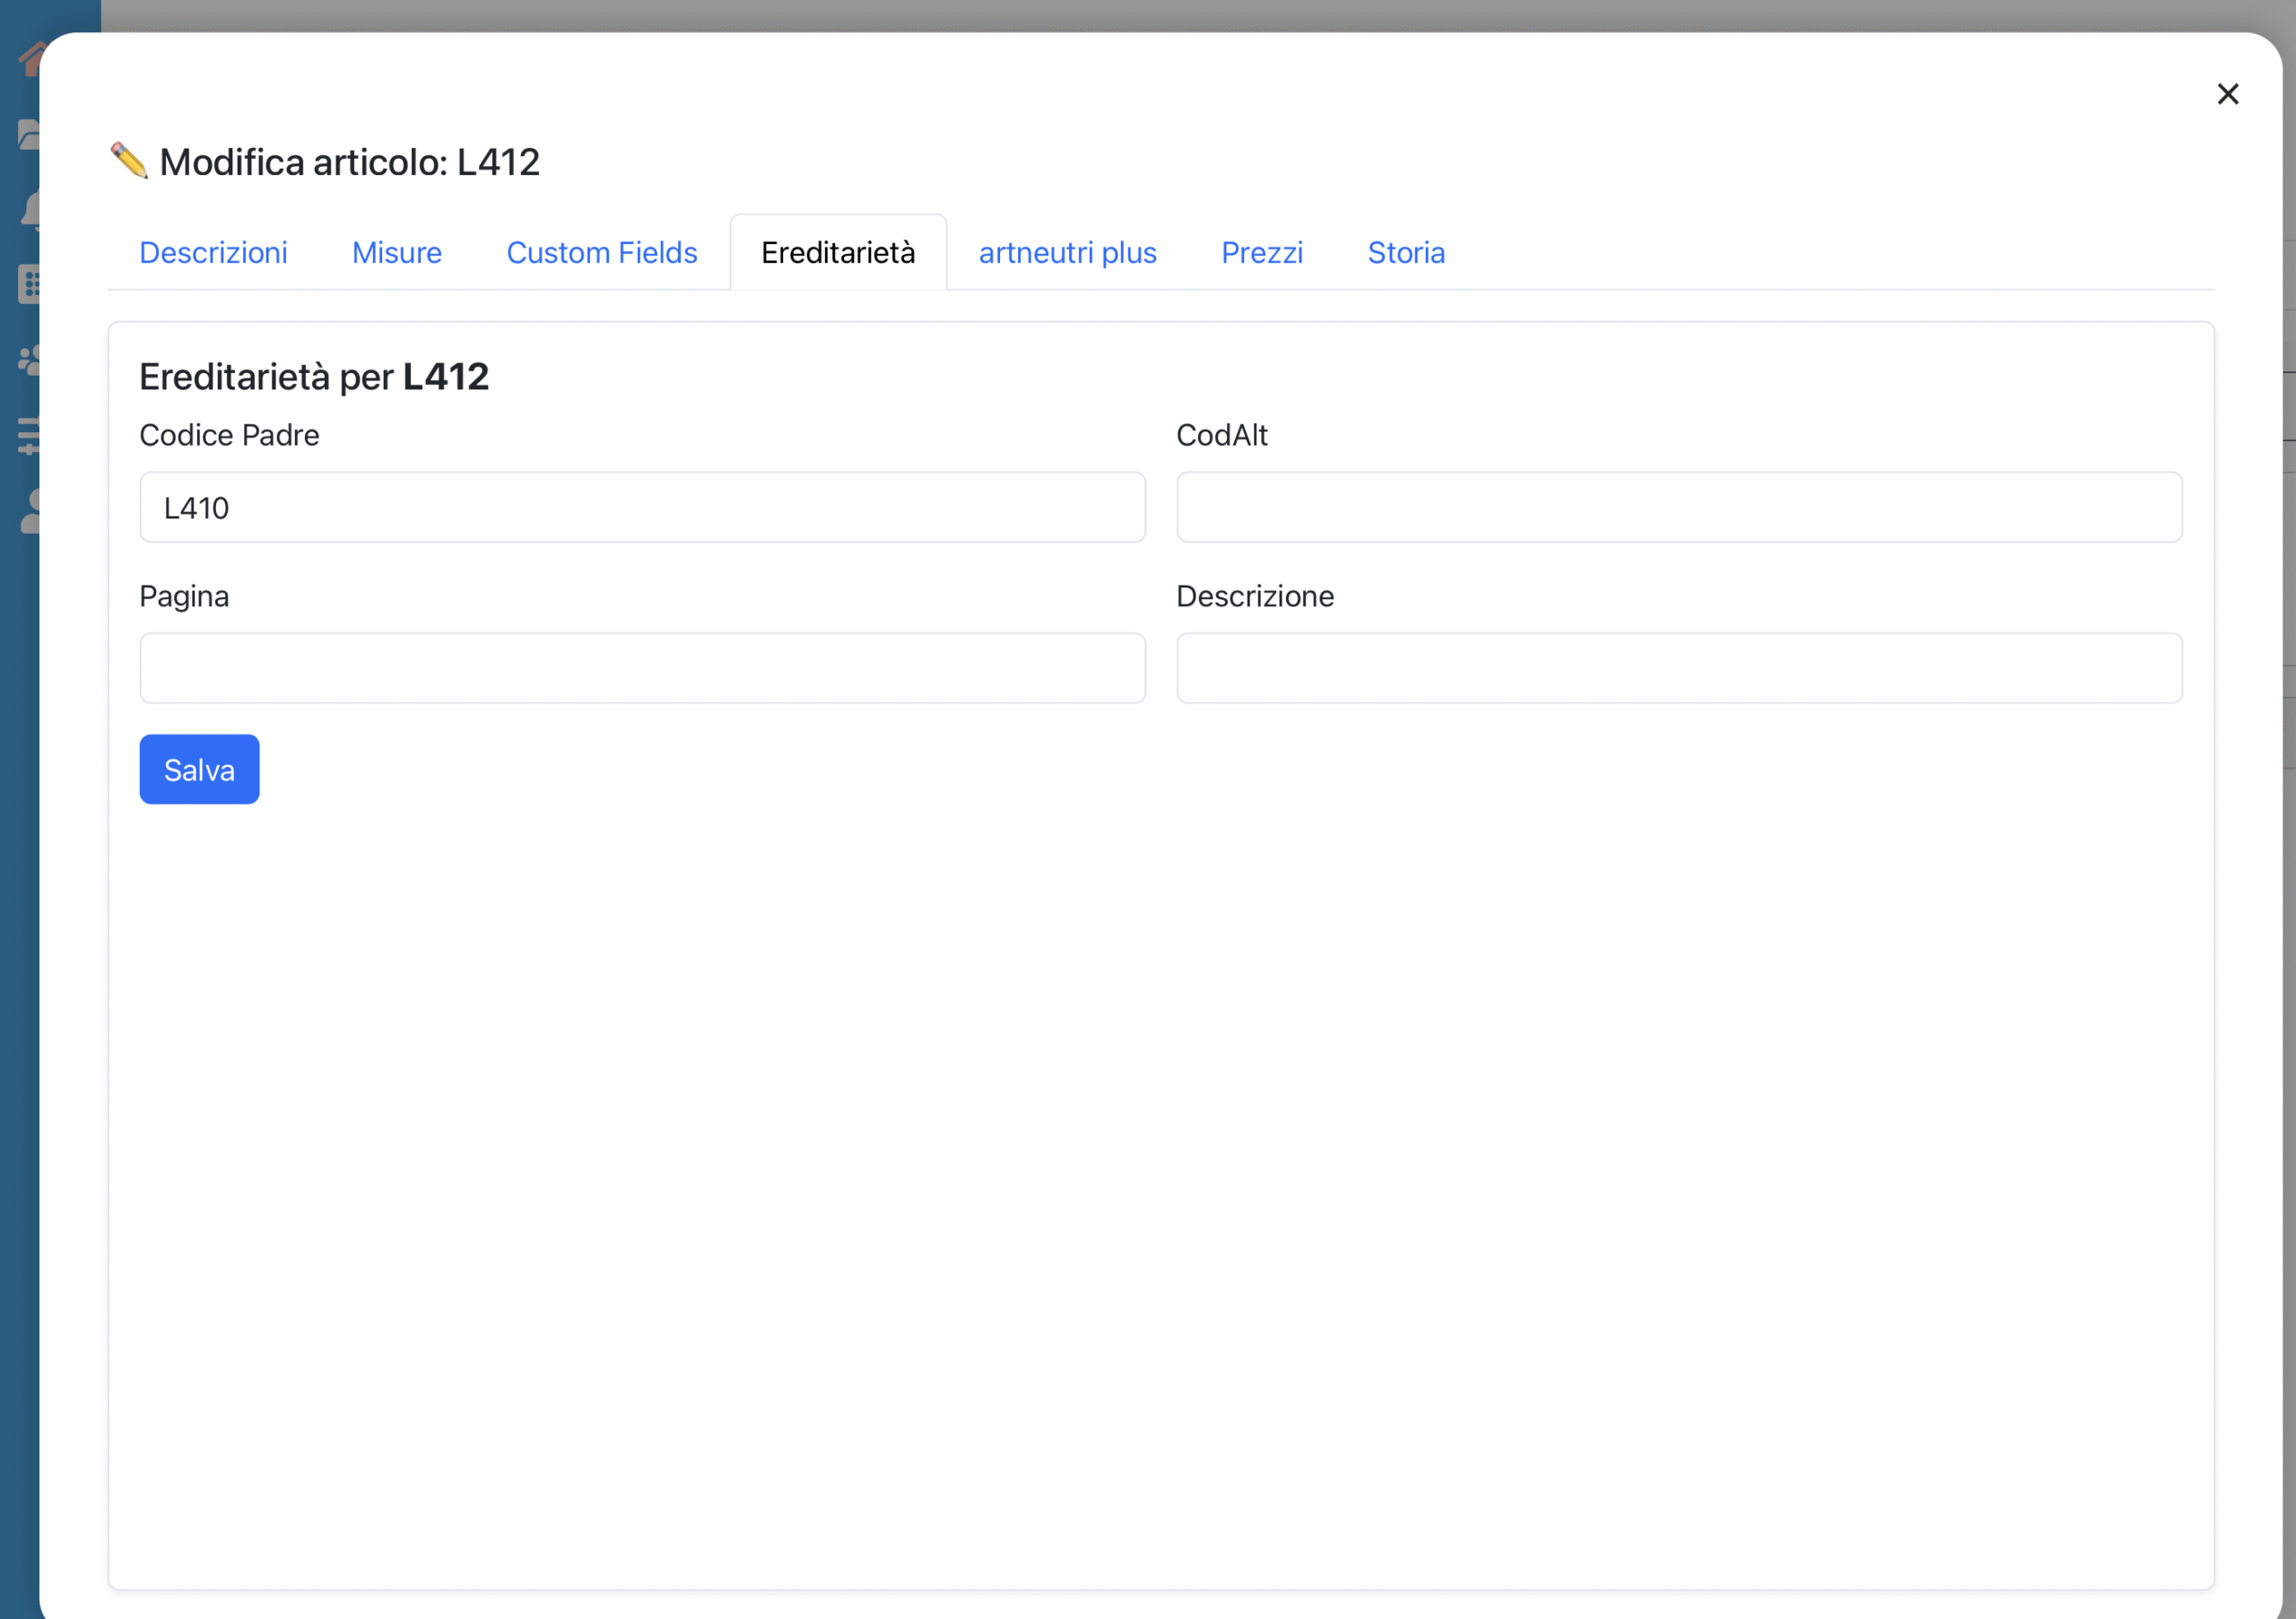
Parent Code: code of the item from which descriptions are inherited.
CodAlt: alternative code for optional registry links.
Page (PAGE): page number of the paper catalog. See easyCatalog chapter.
Description: management description (typically comes from the REST API).
Save (blue) → Confirm the inheritance settings.
Effects of Inheritance
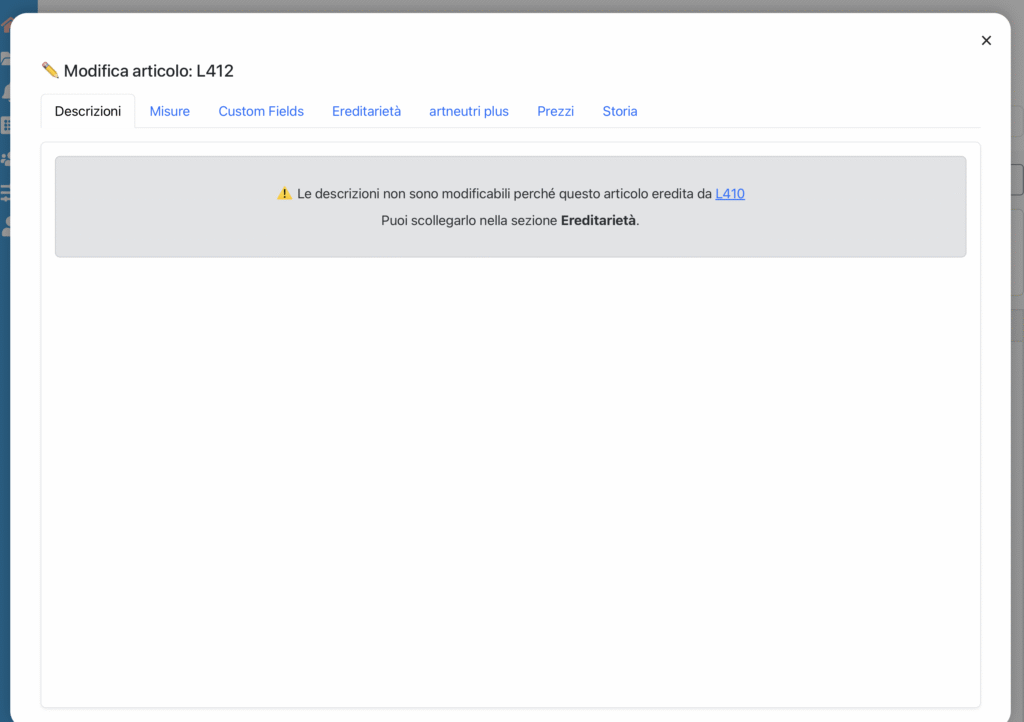
When an item inherits descriptions from a parent, the fields in the Descriptions tab are locked.
A warning is displayed:
⚠️ Descriptions cannot be modified because this item inherits from [parent code].
To modify the descriptions, it is necessary to disconnect the item from the parent in the Inheritance section.
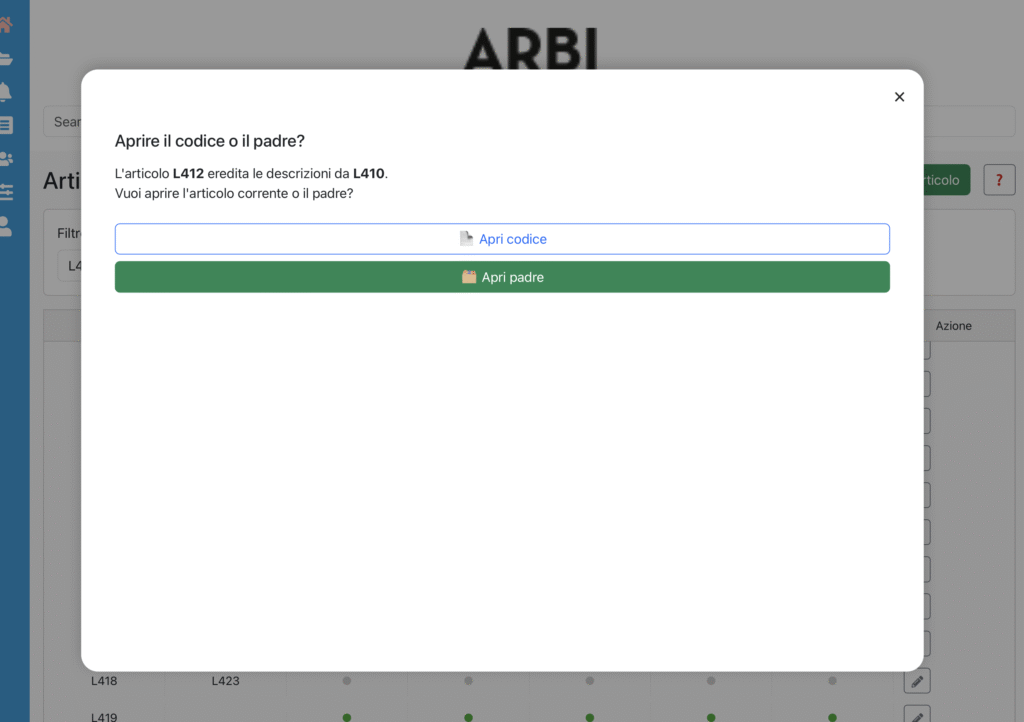
When opening an item linked to a parent, you are asked whether to open:
Code → opens the current item (read-only for inherited fields).
Parent → directly opens the parent item, which contains editable descriptions.
Typical Operational Flow
Open an item.
If it is linked to a parent, the system displays the modal: choose whether to open the code or the parent.
To modify inherited descriptions:
Open the parent and edit the texts (changes are automatically reflected on the children).
Or disconnect the item from the parent in the Inheritance section to make it independent. Simply delete the parent code.
Practical Tips
Use inheritance to manage families of items (e.g., multiple color variants sharing the same description).
Maintain an orderly structure: always assign a clear and consistent parent to avoid confusion in management.
If an item needs specific descriptions, remember to disconnect it from the parent before modifying it.
ArtNeutri Plus
The ArtNeutri Plus section allows for the management of additional fields related to the article database. These fields are generally automatically populated by the company management system via REST API, ensuring consistency and continuous data updates.
Custom Fields
User-defined free fields.
They can be filled in manually or through imports from Excel sheets.
Useful for extra non-standardized information.
ArtNeutri Plus
Structured fields, directly linked to the item database.
Exposed and updated via REST APIs.
Represent official data from the company management system.
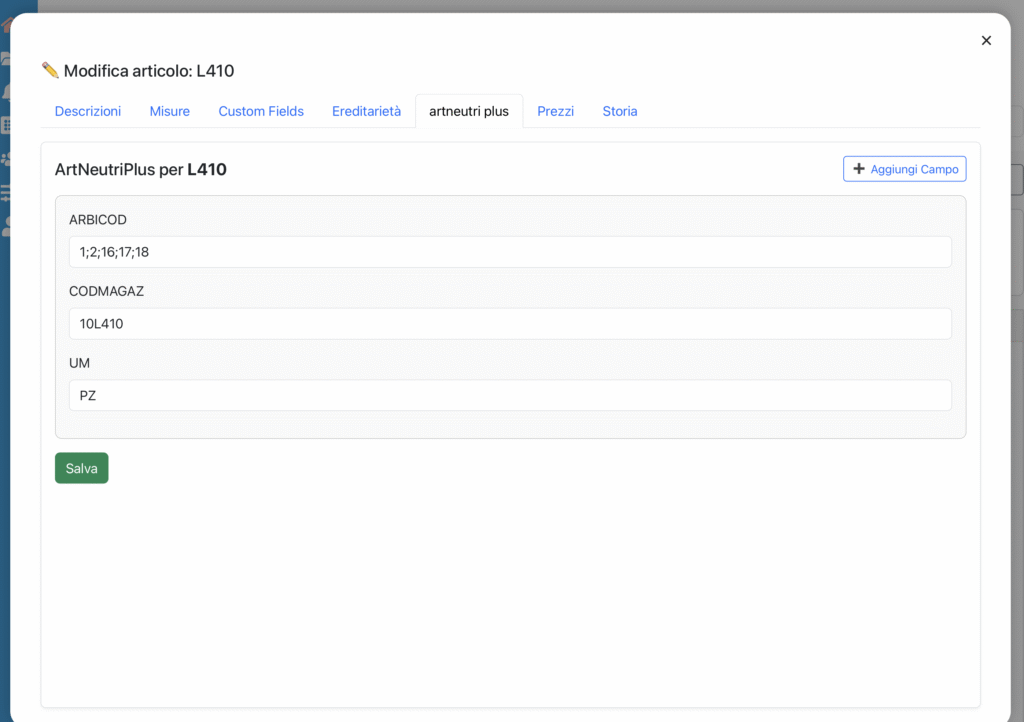
Each item displays the available ArtNeutri Plus fields. In the example, the main fields are:
ARBICOD
Internal reference codes or multiple codes associated with the item.
CODMAGAZ
Warehouse code (identifier used for logistics management).
UM
Unit of measure for the item (e.g., PZ = pieces, M = meters, etc.).
Additional fields can be added using the ➕ Add Field button.
Functions
Input fields → allow you to view and modify values (if enabled).
Save (green) → records the changes made.
Typical Operational Flow
Open the ArtNeutri Plus tab for the desired item. Verify the values imported from the management system.
If necessary, modify or add new fields using Add Field.
Press Save to confirm the changes.
Practical Tips
ArtNeutri Plus should remain aligned with the management system: avoid manual changes if the data comes from external synchronizations.
Use Custom Fields for free-form information and Plus only for structured data that needs to be exposed via REST API.
Pricing
The Pricing section allows you to view and manage the prices of an item based on the different price lists available in the system. Here you can consult the values, verify the source of the prices, and understand the applied calculation logic.
Price List Selection
At the top of the screen, there is a dropdown menu that allows you to select the reference price list. The underlying price list updates based on the selected price list.
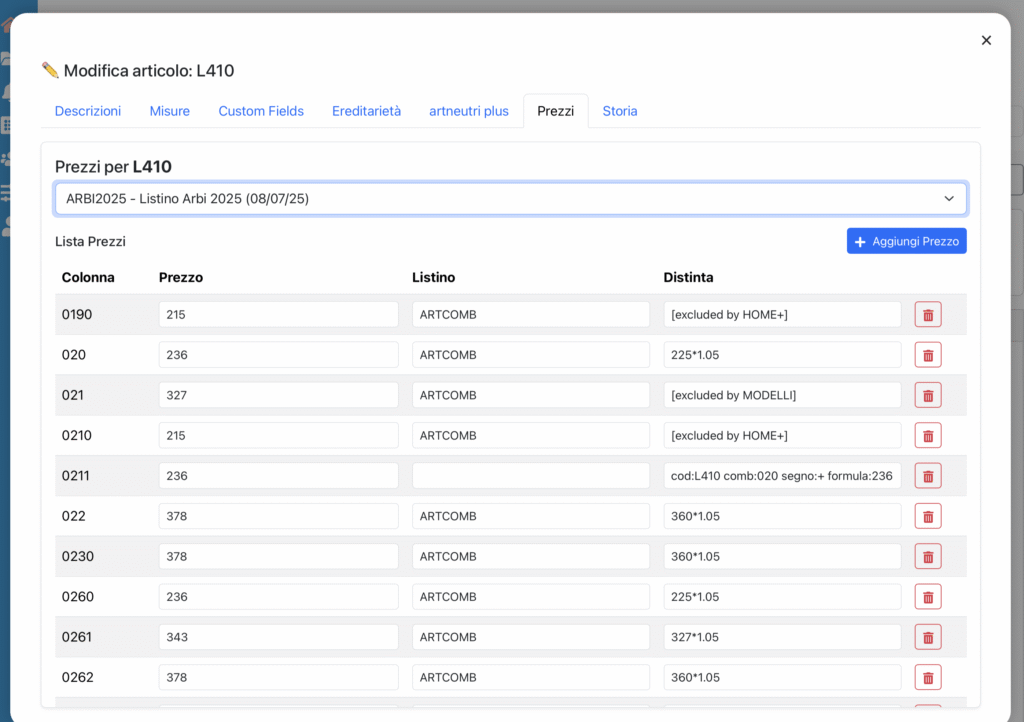
Price Table Structure
Each row represents a price associated with the selected item. The main fields are:
Column
Identifies the column of the Pricelist Server catalog to which the price refers (e.g., 0190, 020, 021).
Price
Value of the price in that column.
Pricelist
Indicates the source of the price.
If the price was imported, it shows the name of the file that last inserted or updated it.
If the price belongs to a calculated pricelist, it indicates the source pricelist used for the calculation.
Details
Provides additional details on the calculation or exclusion:
If it is a calculated pricelist, it may show the formula used to generate the price (e.g., 225*1.05).
If the price was excluded by a specific rule, it shows the name of the exclusion list that inhibited its calculation (e.g., excluded by HOME+).
Functions
➕ Add Price → allows you to manually insert a new price row for the selected column.
🗑️ Delete (red) → removes the price from the list.
Typical Operational Flow
Select the price list from the dropdown menu.
Analyze the prices in the table:
Check the values in the columns.
Verify the source in the Price List field.
Consult any formulas or exclusions in the Bill of Materials field.
If necessary, add or remove prices.
Press Save (if available) to confirm the changes.
Practical Tips
Use the Price List field to understand the origin of the price: whether it comes from an import or an automatic calculation.
Check the Bill of Materials field to understand the applied logic (e.g., markup formulas, category exclusions).
In case of price anomalies, first check the formulas or exclusions before manually adjusting the values.
History
The History section allows you to view the log of changes made to an article. Each significant operation is tracked, indicating the date, the operator who performed it, and the details of the modification.
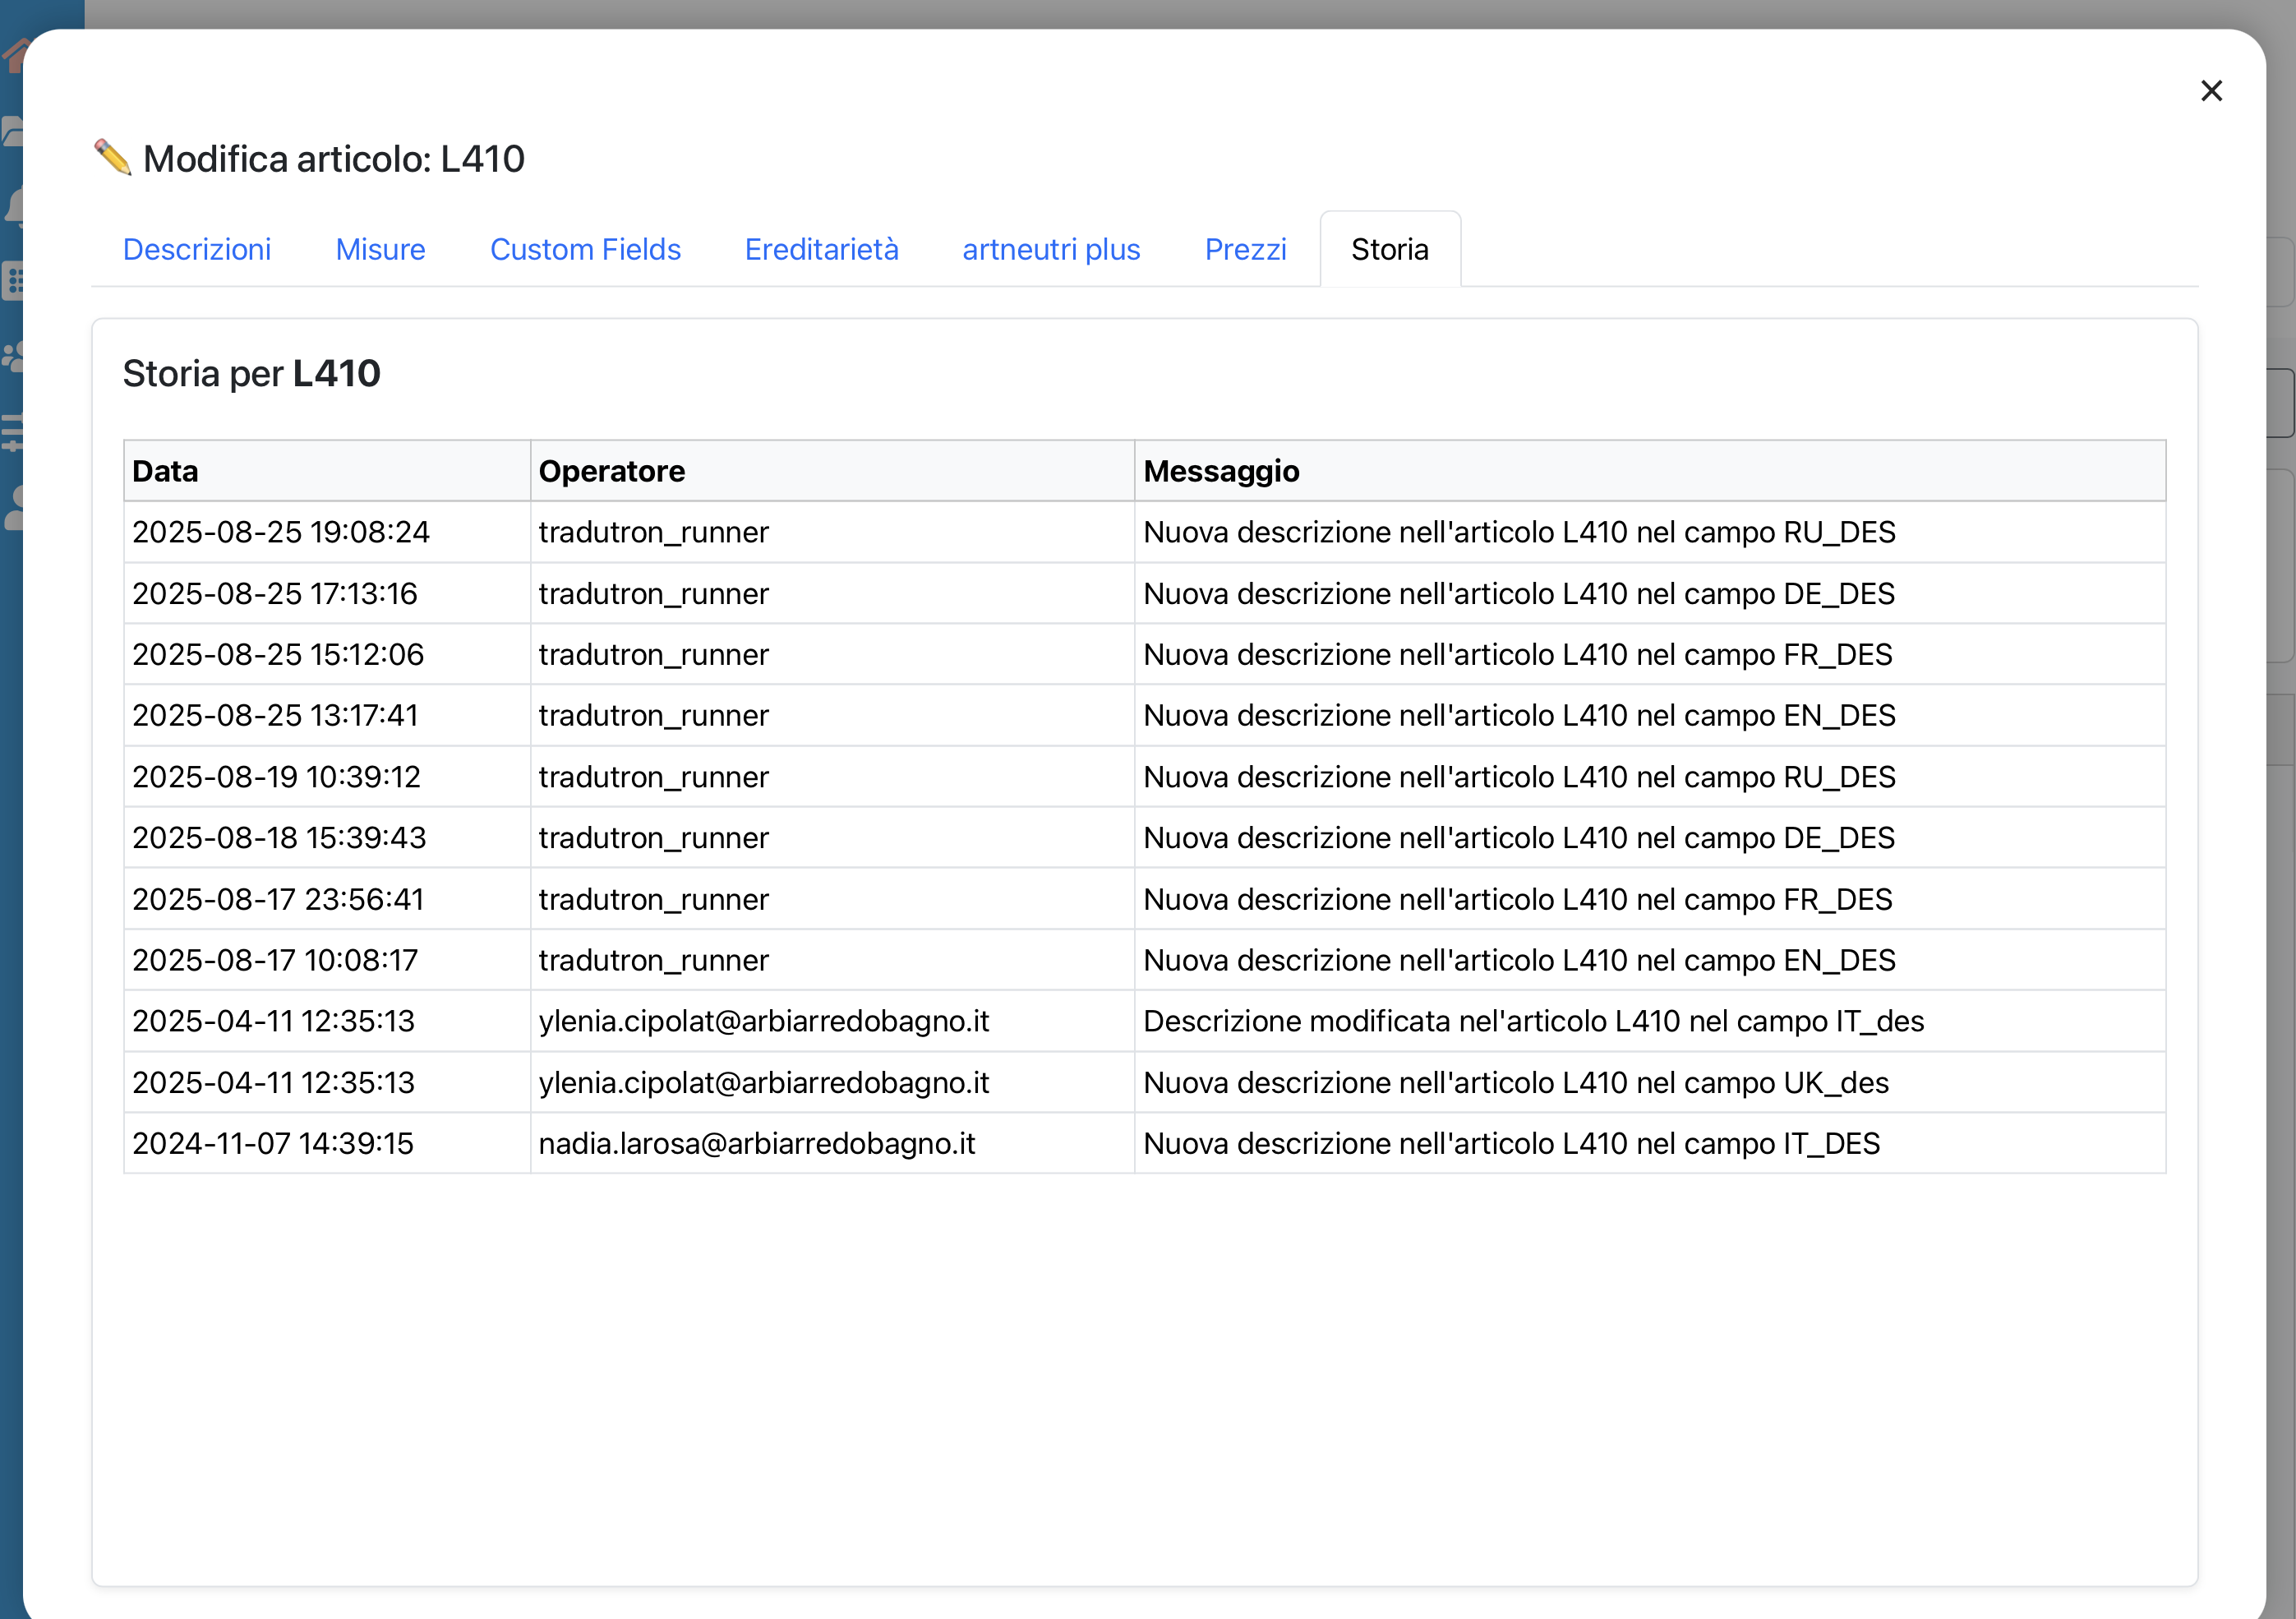
Table Structure
Date: date and time when the modification occurred.
Operator: Identifies who performed the operation:
Human user → displayed with the operator’s email address.
Automatic process → executed by the system (e.g., tradutron_runner that updates translations).
Message: describes the action performed, specifying the field and the item modified.
Example: “New description in item L410 in the EN_DES field.”
Functions
The table is read-only: it is not possible to modify or delete entries.
Records are automatically generated by Pricelist Server.
Typical Operational Flow
Open the History tab of an item.
Review the list to understand when and by whom changes were made.
Use the information to:
– Trace the latest translations entered by TraduTron.
– Verify manual changes made by users.
– Check for any anomalies or duplications.
Practical Tips
If a field is not updated as expected, check here if it was overwritten by an automatic process.
Use the history as an audit trail tool to always know who modified what and when.
In case of collaboration with multiple users, this section is useful for coordinating work and reducing conflicts.